Metal 3D printing could revolutionize manufacturing, but concerns over part quality and certification has kept many industries from jumping into the technology with both feet. From their perspective, the quality and certificate are critical, and essential for parts destined for automotive and aerospace applications.
To improve metal 3D-printed parts, researchers at Lawrence Livermore National Laboratory (LLNL) are examining the complex mechanisms that drive defects and limit part quality. They have also teamed with scientists at the SLAC National Accelerator Laboratory and Ames Laboratory to better understand 3D printing, looking into what leads to defects and how those flaws might be avoided.
The extended team is relying on x-ray imaging and diffraction to peer into metal parts as they’re being printed during the laser powder bed fusion (LPBF) process, a common metal 3D-printing approach. Building on years of research into the physics behind the process, LLNL researcher Nick Calta and his team have designed and built a portable diagnostic machine that probes the melt pool (where the laser meets the metal powder), along with the production of layers that eventually become a fully formed part.
Assembling a portable diagnostic machine was a challenge. To get it to work as intended, the LLNL team first had to move it to SLAC and produce a synchrotron that could create the X-ray flux and high-energy X-rays needed to investigate samples. The instrument provided data on a combination of imaging and X-ray diffraction, allowing researchers to see how metal solidifies—a key determiner of a part’s strength. The hardware let the researchers evaluate the LPBF method and observe melt pool dynamics beneath the surface, providing researchers with new insights into the process. And they are still analyzing data.
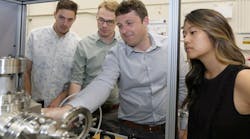
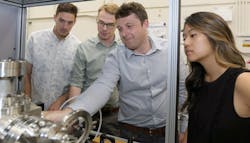
Lawrence Livermore National Laboratory researchers (from left) Phil Depond, Nick Calta, Aiden Martin, and Jenny Wang are part of a multi-lab team that has successfully designed, built, and tested a portable diagnostic machine that can probe inside metal parts as they’re being printed during the laser powder-bed fusion process, a common metal 3D printing method. Researchers hope the instrument will provide insights into the causes of defects in 3D-printed parts. (Photo by Julie Russell/LLNL)
“We’re getting information about the melt pool structure and what can go wrong during a build,” notes LLNL physicist and Laser Materials Science group leader Ibo Matthews. “For example, the vapor plume created by the laser heating the melt pool can create pockets and pores in parts. These pore defects can serve as stress concentrators and compromise the mechanical properties of the part.”
The ability to see layers formed at the melt pool and comparing X-ray images to simulations is confirming predictions of how the laser’s path, heat buildup, and gas plume create defects. Combining this understanding with modeling and detailed experiments could accelerate improvements and generate confidence in parts manufactured through metal additive manufacturing (AM).
The multi-lab collaboration is an offshoot of the Energy Department’s National Laboratories Big Ideas Summit (BIS), an annual event designed to facilitate collaboration and strategic technical planning throughout the national laboratory complex. As part of the project, SLAC is contributing its ability to create unique X-rays and perform diagnostics, while scientists at the Ames Lab are bringing their expertise in powders and metals materials science to the table.
Researchers have already begun mapping out pore formation and extracting information on cooling rates. They expect the new instrument will lead to an improved understanding of the laser fusion process and incite further interest from industry in metal 3D printing. Eventually, researchers want to add optical diagnostics typically used on commercial machines to correlate with the X-ray imaging.
“You can’t tell what’s inside the box by looking outside the box,” said LLNL Chair Anthony Van Buuren. “The purpose of this project is to accelerate the adoption of additive manufacturing (AM) for metallic components across the manufacturing sector by developing sophisticated in-situ tools to enable rapid process development of the AM components.
“With new materials, we don’t yet understand the properties and we need to be able to look at the process in real-time,” Van Buuren added. “It’s a bit different focus than what we usually do at the Lab. We want to build up a capacity that industry would come in and use.”


