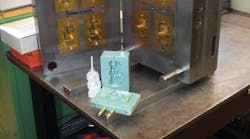
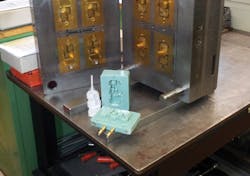
Machined tooling contributes to the majority of production costs for many small-run jobs. 3D printing can reduce the cost of plastic cores, molds, and tooling, but there are several considerations to examine before choosing this route. Patrick Gannon, engineering manager at Rapid Prototype + Manufacturing LLC, Avon Lake, Ohio, offers a few tips on how and when to 3D print plastic molds and tooling.
“There’s no doubt — printing individual and identical prototypes and end-use parts isn’t the right choice for large-quantity jobs and jobs that needed to be done yesterday,” says Gannon.
“What we do know is that 3D printing plastic molds adds value because most machining operations can be eliminated. It’s not uncommon for a machined tool to cost $45,000 and take six to eight weeks to complete. The same mold, 3D printed, will cost about $2,000 and is made in a matter of hours to one week. Printed plastic molds are great for jobs producing 500 parts or less, and for jobs that use complex tooling. But remember, as with any 3D printing project, the best approach is to expect less-than-perfect results. And, if you have to make multiple versions of the tool, you begin to lose the benefits.”
Printed plastic molds can be used in injection, extrusion, and blow-molding processes. Printed tooling can be used in vacuum-forming, thermoforming, and drape-forming processes. In thermoforming applications, for example, printed tooling can make blister packaging for consumer products. Tooling for packaging development may require multiple cavities and, with each cavity, there might be thousands of vent holes. Printing cuts the time and cost spent to drill or CNC those holes.
Cores used to make molds can also be printed. For instance, a printed part can act as the core to make silicone molds. Cores are traditionally machined from plastic, wood, or metal depending on the tolerance needed and the surrounding temperature. Even though printed cores may require sanding to get a smooth finish, costs are lower than a core requiring several machining processes.
Most 3D printers use a soluble structural material. This material can be removed with a solvent or chipped away. Cores printed from soluble material can be used in lost-wax casting applications. Soluble material can also be used as the master for open-molding processes such as spray or hand lay-up. For open-molding processes, print a soluble master slightly smaller than the desired part and layer the master with materials like fiberglass and resins. After the materials are cured, the soluble material can be removed.
Choosing the material
Printed molds, tooling, and cores may require different materials. And, material choice will continue to vary by the process and application. For instance, an injection mold will need high-heat and chemical-resistant material. Ultem of polyphenolsulfone (PPSF/PPSU) satisfies those specifications.
No matter the material — the printed mold, core, or tooling must withstand higher heat than the injected, dipped, poured, sprayed, or hand-layed material. If the print will be exposed to high temperatures, one recommendation is PPSF/PPSU. If the print needs to be certified for flame, smoke, and toxicity, then Ultem would be the material of choice. If the process will apply pressure on the print, polycarbonate acrylonitrile-butadiene-styrene (PC-ABS) can be used because it has the highest impact resistance. And, ABS-M30i or PC-ISO is suitable for processes that need to use material that is ISO-10993 certified. All of these materials work with fused-deposition-modeling (FDM) printing machines.
Model design and tolerances
Tolerance must be taken into account when designing a mold. This means opening up gaps and realizing that you will never get extremely tight tolerances. If extreme tolerances are needed, a printed mold will not be acceptable right off the printer — even after postmachining.
3D printed mold design is similar to metal molds. Mounting holes can be modeled in the same pattern as a metal mold. And, if overmolding or dual material injecting is desired, the design mimics metal molds. However, printed design changes when heat transfer is an issue. Plastic molds transfer heat poorly so to help move heat, add several holes to the mold to help cool injected parts quicker. Another method is to insert copper or other heat-transfer materials into the holes.
Print and fit the mold
After converting the model into an STL file, upload the file to the software that works with the printer. Choose the resolution, material, and machine that will print the mold. Different systems allow more or fewer adjustments to the build specifications, but the program does most of the work at that point. Set the printer up with the material and (in some machines) the tip to be used. Check for any calibration and cleaning needed, and then start printing. Remove the mold and clean off support material — polish the mold as needed. Plastic molds fit the same as machined molds, so they can be directly inserted into most process machines. But depending on the tool and part, you might need to create a metal box around the plastic to hold it together.fri

