Get the Most Out of Your FDM 3D Printer
Fused Deposition Modeling (FDM) 3-D printers are becoming pretty common and affordable these days, from the small, inexpensive $1,400 MakerBots up to the huge $750,000 Fortus machines. As you would expect, you can print one-piece prototypes of your rigid plastic parts, but did you know there is a whole spectrum of other things you can accomplish with your machine? Vertically integrated companies, such as mine, use the FDM process from product design to end-use parts in our factory. This variety of needs has inspired us to push the limits of our printer and I want to share with you some of the solutions to interesting problems we have encountered for use in your own foray into the 3D printing world.
First, let’s look at some issues that come up with making the prototypes of molded parts that were likely the justification for your machine in the first place. Often times, your part is larger than your machine’s build size allows. What to do? The solution is pretty easy—break your model into smaller pieces in your CAD program, and add tabs for locating and gluing on the hidden side of split faces.
Now you can appreciate the savvy of the designers of those plastic model airplanes you may have built as a kid! Another option we have used, mostly when we are working on the form or aesthetics of a part, is to print the part at a reduced scale. This allows you to still evaluate the part form, but without the time and materials commitment to a full build.
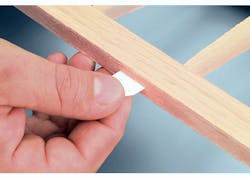
One downside to FMD printers, especially the affordable ones, is the limited materials available to print. On our machine you are pretty much confined to an ABS-like material, albeit in a decent range of colors. But our products often involve living hinges, and you need a flexible, polypropylene-like material to make that workable. Not to be foiled, we have had good success on linear living hinges by borrowing from the model airplane world—a product known as “CA Hinges” since they use cyanoacrylate adhesive.
These are flexible bits of a special fabric that are very absorbent to CA adhesive but still flex for many, many cycles after the glue sets. Either design or cut thin slits in your model for the flexible fabric to slide into. Then glue the hinges in place and you have a great living hinge substitute without having the expense or time of outsourcing the build.
An inherent property of the FDM process is that printed parts are porous. Even when we print in the “solid” density mode, porosity exists since the model is made up of nearly round strands. This shortcoming becomes very evident in our business of water-testing equipment and chemicals, as printed parts are not watertight. But don’t despair: a simple fix is as close as your hardware store. Just seal the surface of the model. My favorite is acetone. You can brush, dip, or even spray it on. Just enough to wet the surface will seal it and produce a very glossy finish. It is a good idea to practice this on some spare printed parts before working on your masterpiece. Another way to seal is with CA glue or some of the thinner solvent glues. But be aware that you can end up with a puddle instead of a part if you use very aggressive solvents or leave the part in the acetone too long. A commercial system is available for this (called a finishing station), but it’s fairly expensive and my VAR said they sell very few of them due to the cost, plus the ease of the above solutions.
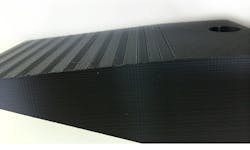
One of the reasons we bought the printer is to be able to very quickly show our customers a new product and get feedback before going into production. As you well know, the finish on an FMD part is rather striated and can be very crude when shallow angle or curves are nearly parallel to XY build plane.
So in order to spruce things up a bit and keep our sales department happier, we improve the finish of models that will be in front of customers. How? First, we seal and smooth a bit with the acetone. Next, sanding, body putty and more sanding, followed by sandable primer and a final coat of paint with the desired gloss produces great-looking parts. You or whoever is doing the work will need some patience to get the best results. We usually add digitally printed decals from our graphics department for a final touch and the results are really quite good.
Resolution is relatively limited on the lower-cost FDM printers, so if you are working out some very fine design details on small parts, don’t think you automatically have to sub it out and get an SLA part made—though that does of course work well if you have the time and budget. Instead, scale up the part so that the resolution of the printer is not a constraint. We have blown up small parts 6 to 10 times normal scale in order to work with details within the constraints of the printer’s resolution.
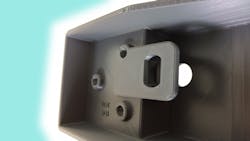
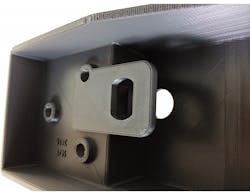
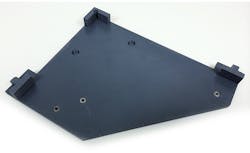
Another application for our 3D printer that accounts for about 30% of its usage is printing end-use parts for our manufacturing operations. This is done for several reasons, including fast turnaround, ease of design, ability to add extra features, lower costs, and it’s just plain cool to make your own functional parts! Machinery guards are one area we make a lot of parts for. 3D printing lets us make belt guards with odd shapes, going around corners, with integral mounting bosses and belt replacement info printed on them. I have found this to be much easier and faster than coming up with a sheet-metal or fabricated design. Sensor brackets are another kind of part we print quite often. Photoeye mounts, limit-switch mounts, fiber-optic tip brackets are all fair game. It’s easy to include ambient light shielding, and pick up existing mounting holes.
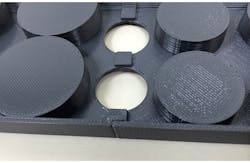
Creating jigs for precision placement of drilled holes is another useful application of 3D printing.
We have made these jigs for one-off projects but also build jigs used to rework hundreds of product housings that become next generation instead of being scrapped. Just print the jig with holes sized for heat set drill bushings, add tabs or bosses to locate the jig on the part to be drilled and you will be ready to go. Some nice touches that cost basically nothing are to print things like the print date, revision, orientation arrows, part name, and number somewhere on the jig for ease of use and tracking.
Of course, there are the fun non-work projects we all have in the back of our minds. To keep costs under control, I use the bit of material that is left in the printer cartridges just before we recycle them. Since it can require a few of these cartridges to complete your build, you often get a multicolor printed piece, which can be a nice effect.
So those are a few of the ways to expand the usage of your amazing new engineering tool. In my next installment on FDM printing, I will talk about applications that are even more “off-label” than the ones above. Have fun with your machine and let me know in the comments section below other ways you may have pushed the FDM printing envelope!
About the Author
JB Babcock
Director of Engineering
JB Babcock is director of engineering at Taylor Technologies (www.taylortechnologies.com) and is also an engineering consultant and an expert witness. He has over 30 years of experience in machine design, factory automation, and consumer product design. Prior to joining Taylor Technologies, Babcock was director of engineering at Sun Automation group, and before that ran his own engineering consulting firm for 14 years. JB earned a master’s of engineering management from George Washington University and B.S. in Mechanical Engineering from Lehigh University.
